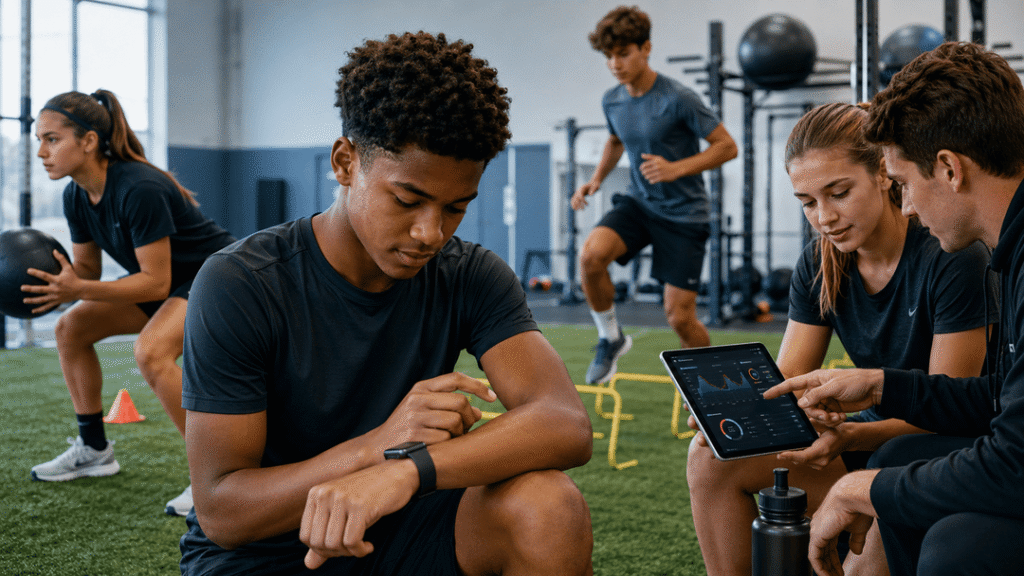
Most commercial fitness trackers are like horoscopes. They promise personal insights but give generic advice. Why not make your own precise analytics instead?
Creating your own monitoring gear is more than a tech challenge. It’s a stand against generic health data. Imagine tracking your heart rate with Swiss-watch precision or analyzing your sprint like a Formula 1 engineer.
From Kate Hartman’s “Wearable Electronics,” we learn how custom sensor projects let you go beyond commercial limits. Like DiaFit’s tailored glucose monitors, personal tech changes how we see our bodies.
Are you ready to design your own fitness intelligence? Let’s see why custom is always better than generic.
What You’ll Need: Hardware & Software
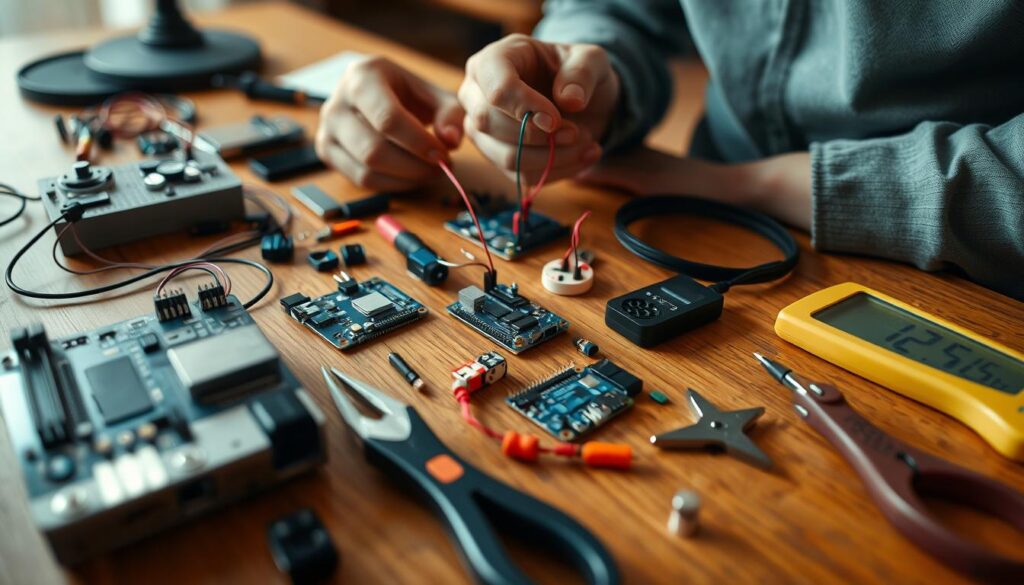
Building sports sensors is like preparing for a gourmet cooking show. You need quality ingredients and the right tools. Without them, you’re just wasting money.
First, the hardware. Microcontrollers are your foundation. Arduino is simple and reliable for beginners. Raspberry Pi offers serious computing power for complex projects.
Sensors turn physical actions into data. Accelerometers track movement. Heart rate monitors measure cardio intensity. Pressure sensors detect force impacts. Hartman’s guide shows how to make wearable tech with conductive threads and fabrics.
Software brings your hardware to life. Arduino IDE programs your sensors with C++-like syntax. Python is great for Raspberry Pi projects because of its versatility. Both platforms have lots of libraries and community support.
Accessories expand your project’s capabilities. HATs (Hardware Attached on Top) turn your Raspberry Pi into specialized devices. They add advanced functionality, from audio processors to environmental monitors.
| Component Type | Arduino Options | Raspberry Pi Options | Best For |
|---|---|---|---|
| Microcontrollers | Uno, Nano, Mega | Pi 4, Pi Zero | Basic vs advanced projects |
| Sensors | Accelerometer, gyroscope | Camera module, GPS HAT | Motion vs visual tracking |
| Programming | Arduino IDE | Python, Node-RED | Simple coding vs complex logic |
| Expansion | Shields | HATs, pHATs | Standard vs specialized add-ons |
Choose your tools wisely. The right tools can turn a basic step counter into an advanced biometric monitoring system. The right combination makes all the difference.
Setting Up Arduino for Tracking
Ever tried teaching your grandfather to use TikTok? That’s what setting up an Arduino feels like at first. It’s like ancient tech doing modern tricks. But, this microcontroller might outsmart your expensive fitness tracker if set up right.
Begin by downloading the Arduino IDE. It’s where the magic happens. Plug in your board via USB, and you start speaking machine language.
Writing sketches is the fun part. Think of them as love letters to your sensors. They make hardware come alive. For a basic step counter, program an accelerometer to detect motion.
Hartman’s guide is key. You’ll need breadboards, resistors, and sensors. They’re like LEGO for grown-ups. Connect them carefully to avoid damage.
Why choose Arduino over pre-built trackers? Control. Arduino shows you everything, unlike commercial trackers that hide data.
The beauty is in its simplicity. No extra software or hidden algorithms. You get pure, unfiltered data. It’s not just a device; it’s about understanding.
So, grab that microcontroller. In thirty minutes, you’ll turn wires and chips into a custom fitness tracker. Now, if only we could get grandfather to stop dancing to TikTok videos…
Using Raspberry Pi for Advanced Metrics
If Arduino is your go-to, Raspberry Pi is for when you want to push the limits. This tiny computer is a powerhouse for complex data. It’s like switching from simple math to advanced calculus in tracking your sports performance.
Why choose Raspberry Pi for your sports sensors? It’s all about processing power. Arduino is great for basic sensor readings. But Raspberry Pi can handle GPS tracking, video analysis, and AI insights. It’s the difference between knowing you ran and understanding your performance.
See what others have done with Raspberry Pi. Tom’s Hardware shows a Pi-powered smartwatch that does calls and notifications. Your sports sensors can be just as advanced.
Setting up Raspberry Pi for sports metrics involves three steps:
- Install Raspberry Pi OS – your foundation for complex operations
- Connect sensors through GPIO pins – heart rate, environmental data, motion tracking
- Configure your software stack – Python libraries for data analysis are your best friend
Customization is key. Raspberry Pi runs full operating systems. This lets you create dashboards for real-time metrics during workouts. Imagine seeing your heart rate zones, pace, and form analysis update live.
For advanced metrics, Raspberry Pi offers:
- Multimedia feedback – audio cues when you hit target zones
- Environmental data integration – how altitude affects performance
- Machine learning analysis – pattern recognition in your training data
Ready to go beyond basic tracking? Raspberry Pi brings elite-level data analytics for athletes. Your training data will never be the same.
Collecting Data
Think of data collection as your own sports detective work. Every detail, from heartbeats to muscle twitches, is evidence. It’s not just watching numbers; it’s active detective work.

Your tools become data-gathering powerhouses. A force-sensitive resistor tracks every impact. A heart rate sensor monitors intensity with precision.
Circuit design is key. It’s like building neural pathways for data. Get it right, and data flows smoothly. Mess it up, and you face a mess.
The DiaFit project shows how to integrate feedback. It uses visual, audio, and haptic cues. This ensures you feel the data, not just see it.
Calibration is critical. Proper sensor calibration turns random numbers into useful data. Without it, you’re lost.
Microcontrollers manage your data. They filter out bad data, ensuring only quality gets through.
This step is for serious data scientists. It reveals patterns athletes might miss. But, if done wrong, it’s just expensive play.
Quality data collection turns feelings into facts. A great workout becomes measurable. A powerful swing is quantifiable. You’re turning intuition into evidence.
Analyzing & Using Your Data
Congratulations, data detective—you’ve collected the numbers. Now, it’s time to turn them into something valuable. This requires more than just looking at spreadsheets. You need to be like Sherlock Holmes and Tony Stark combined.
For Arduino fans, start with serial plotting. It’s like learning to ride a bike with training wheels for data. Watch your numbers move like stock market tickers. When you’re ready for more, Raspberry Pi offers Python possibilities. You can make heat maps or chart your activity intensity like a weather forecast.
The real magic is in making personalized feedback systems. Commercial trackers can’t compete with this. Take inspiration from medical devices like DiaFit. Why just see numbers when you can have LED lights show your achievements?
Program vibration motors to buzz when you hit your heart rate targets. Create audio cues that are more exciting than your favorite podcast theme. It’s like having a personal coach whispering tips in your ear.
Think about your data as a personal coach. That sudden dip in reaction time at 3 PM? Maybe skip that coffee. The consistent peak on Tuesday mornings? Schedule your most important training then.
Your DIY system is not like generic reports for average athletes. It’s tailored to your unique needs and goals. It’s like wearing a custom-made suit compared to an off-the-rack one.
The beauty is, you’re having a conversation with your body. Each metric tells a story, each pattern reveals a secret. Your job is to listen, interpret, and respond like a therapist who loves circuit boards.
So, fire up those scripts, tweak those feedback mechanisms. Remember, in DIY sports analytics, you’re not just an athlete. You’re the coach, the statistician, and the entire team all in one.
Real-Life Applications
Forget lab coats and basement workshops—your DIY sports sensors are ready for prime time. They’re not just for tech enthusiasts; they’re game-changers. They change how we train, compete, and socialize. Think beyond the bench and into the real world.
Imagine a wearable that changes your workout playlist based on heart rate. Or a sensor-packed basketball jersey that checks your form in real-time. These aren’t sci-fi fantasies—they’re real with projects like DiaFit.

DiaFit shows how customizable wearables fit into different lives. They work for indoor workouts and outdoor adventures. They even work in social settings where you might want to keep things private. The technology fits right into your life.
The Raspberry Pi smartwatch example is another proof. It shows you can have powerful metrics without big, bulky gear. These portable wearables offer advanced features without losing style or convenience.
Whether you’re a weekend athlete or a pro, these tools are your tech partner. They don’t just track data; they make experiences better.
The real magic is when your DIY project becomes a real tool. That’s when DIY becomes did it yourself and it actually works. Your project could be the next big thing in sports tech.
Safety Tips
Let’s be real: nobody wants their workout tracking to end with a trip to the emergency room. Building your own sports sensors is like becoming Tony Stark in your garage. But, even Iron Man had safety protocols. Your DIY wearable electronics deserve the same respect.
Circuit insulation isn’t just a suggestion—it’s your first line of defense against becoming a human conductor. Proper insulation materials prevent short circuits that could turn your sweat session into a shocking experience. Moisture and extreme temperatures are electronics’ natural enemies, so keep your creations protected.
Battery handling requires special attention. Lithium cells pack serious power but can become temperamental if mistreated. Think of them as diva performers—they need careful handling and proper storage to avoid explosive performances.
When integrating conductive threads into clothing, ensure no sharp edges or exposed wires touch skin. Skin irritation or minor shocks might not seem serious, but they’ll definitely ruin your workout motivation. Always test your sensors in controlled environments before taking them for a real run.
Here’s a quick safety checklist every DIY enthusiast should follow:
| Safety Area | Potential Risks | Prevention Measures | Emergency Response |
|---|---|---|---|
| Circuit Insulation | Short circuits, electric shocks | Use proper insulation materials, secure all connections | Disconnect power immediately |
| Battery Handling | Overheating, explosion risk | Use appropriate battery cases, avoid overcharging | Have fire extinguisher nearby |
| Wearable Integration | Skin irritation, discomfort | Test on mannequin first, smooth all edges | Remove immediately if irritation occurs |
| Environmental Factors | Moisture damage, temperature issues | Waterproof sensitive components, avoid extreme conditions | Power down and dry thoroughly |
Keep a fire extinguisher within reach during testing phases. It’s better to have it and not need it than to need it and not have it when your electronics decide to rebel. Regular equipment checks become your maintenance ritual—like stretching before exercise, but for your gear.
DIY projects should empower your athletic performance, not endanger it. Smart safety practices ensure your innovations remain injury-free and actually help you achieve your fitness goals. Because let’s face it—explaining to your friends that your sports sensor gave you a shock is way less cool than showing them your improved running metrics.
Conclusion
Building your own sports sensors is more than a weekend hobby. It’s a way to stand out from the crowd. You’ve learned how to use Arduino and Raspberry Pi to get personal insights from data.
Why stick to what’s common when you can make it your own? You can create everything from simple fitness trackers to complex biometric monitors. This isn’t just a dream. It’s the start of a new era in personal technology.
So, don’t be afraid to get creative. Change the game for athletes in the digital world. Your data is yours to control.